(更新履歴)2024/12/24 画像の表示を修正、動画をXからYoutubeに変更
前提条件
NavMeshとInput Systemのインストールが必要です。
導入方法については以下の記事をご覧ください。
実装例
NavMeshとInput Systemを使って、クリック(タッチ)した場所にキャラクターが自動で移動する処理を実装していきます。
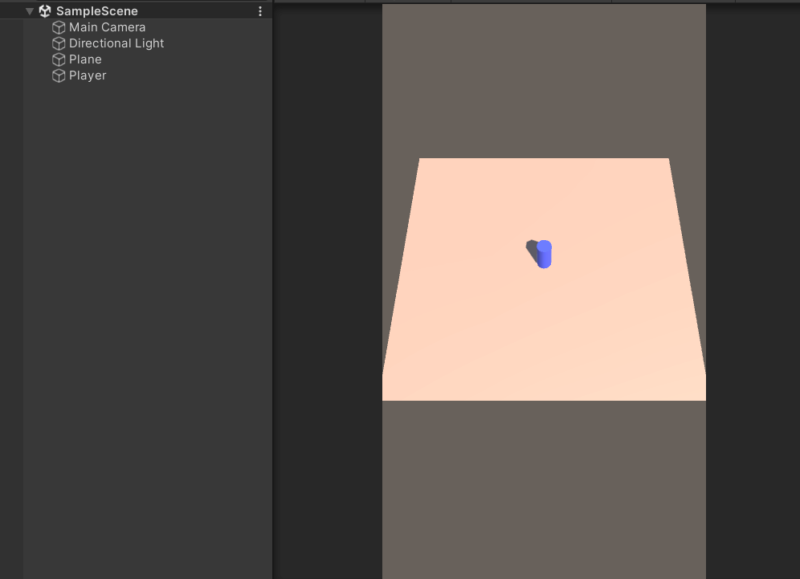
プロジェクトを作成し、プレイヤー(Cylinder)とフィールド(Plane)を作成しておきます。
クリック(タッチ)した座標を取得
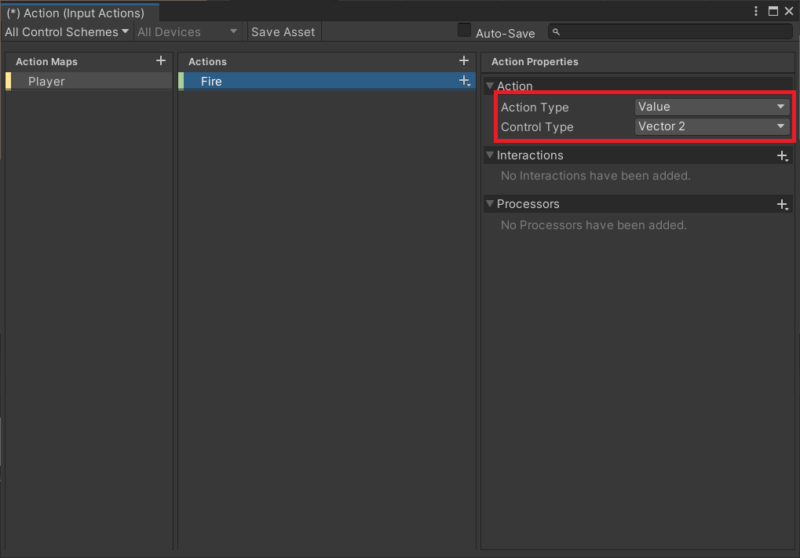
Input Actionを作成し、クリックしたときにその座標を取得するアクションの設定をしていきます。
任意の名前でアクションを作成し、Action Typeを「Value」、Control Typeを「Vector2」に設定します。
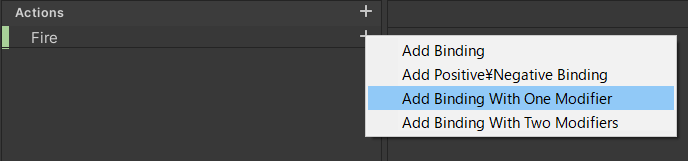
バインドを追加します。
+をクリックして「Add Binding With One Modifier」を選択します。
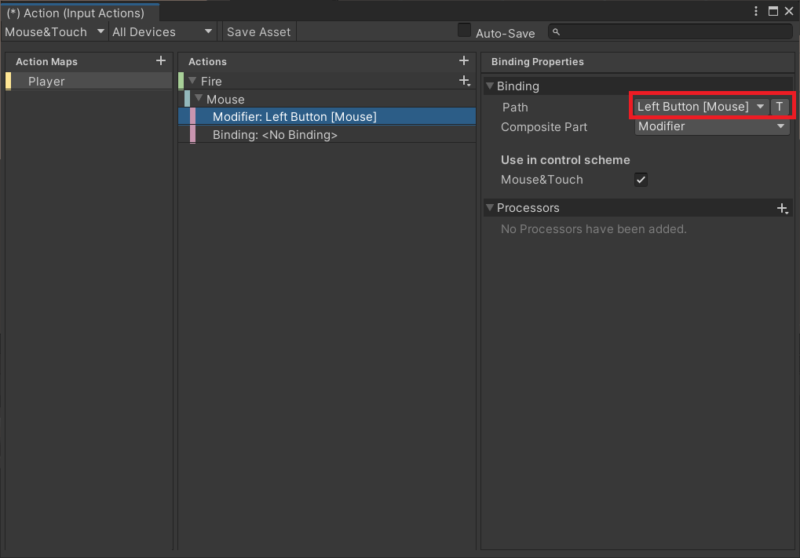
まずはマウスでクリックした時用のアクションを作ります。
今回は左クリックで移動させたいので、Modifierに「Left Button」を設定します。
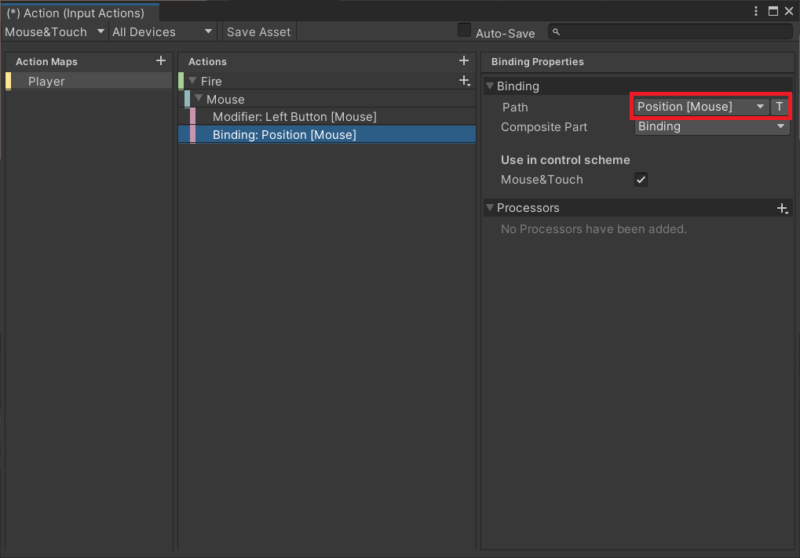
BindingにはMouseの「Position」を設定し、座標を取得できるようにします。
同様にスマホ用のアクションも作ります。
「Add Binding With One Modifier」でバインドを追加し、Modifierに「Primary Touch/Tap」、BindingにTouchscreenの「Position」を設定します。
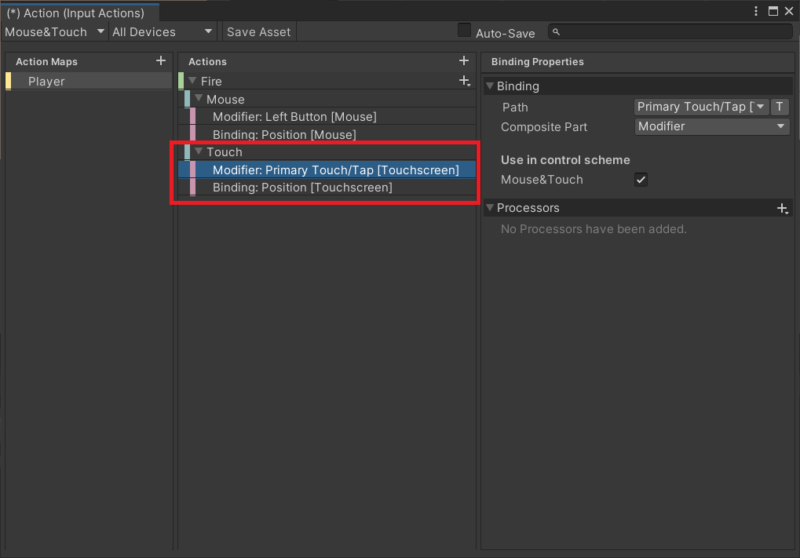
設定が出来たら「Save Asset」をクリックして保存します。
新規C#スクリプトを作成し、以下のコードを記述していきます。
using UnityEngine;
using UnityEngine.InputSystem;
public class MoveTest : MonoBehaviour
{
public void OnFire(InputAction.CallbackContext context)
{
if (context.phase == InputActionPhase.Performed)
{
Debug.Log(context.ReadValue<Vector2>());
}
}
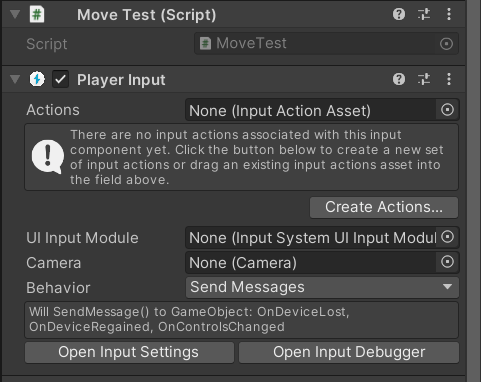
}プレイヤーオブジェクト(Cylinder)に上記のスクリプトと「Player Input」コンポーネントをアタッチします。
Player Inputで、Actionsに作成したInput Actionファイルを設定します。
また、Behaviorを「Invoke Unity Events」に変更します。
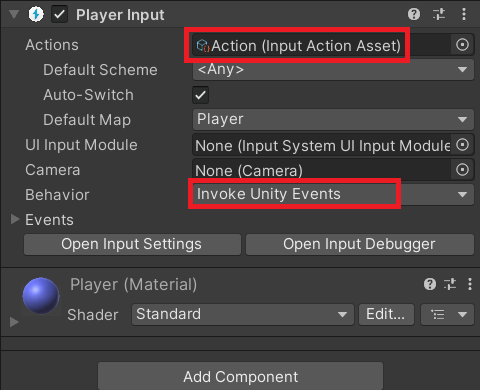
Behaviorを変更すると下に「Events」が表示されるようになります。
展開すると各アクションに対して実行するメソッドを指定できるようになっているので、オブジェクトをドラッグアンドドロップしてメソッドを選択します。

ここまで出来たら、いったん実行して動作を確認してみます。
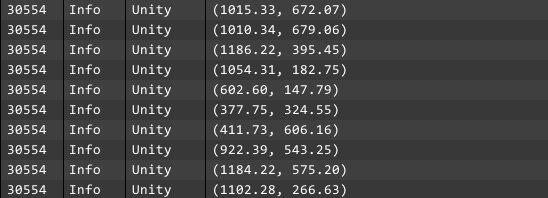
画面をクリックして、コンソールにクリックした位置の座標が表示されていればOKです。
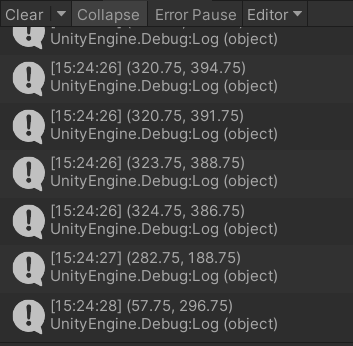
スマホで実行した場合も、画面タップで座標が表示されました。
NavMeshの移動先を指定
座標が取得できたので、この座標をNavMeshの目的地として指定します。
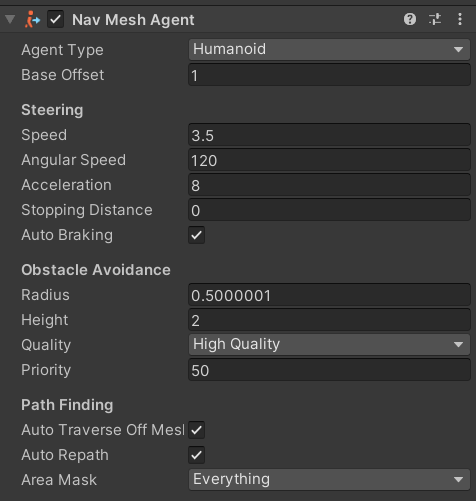
プレイヤーオブジェクト(Cylinder)に「NavMeshAgent」コンポーネントをアタッチします。
スクリプトに以下の赤字部分の記述を追加します。
using UnityEngine;
using UnityEngine.AI;
using UnityEngine.InputSystem;

public class MoveTest : MonoBehaviour
{
    NavMeshAgent agent;

    void Start()
    {
        agent = GetComponent<NavMeshAgent>();
    }

    public void OnFire(InputAction.CallbackContext context)
    {
        if (context.phase == InputActionPhase.Performed)
        {
            RaycastHit hit;

            if (Physics.Raycast(Camera.main.ScreenPointToRay(context.ReadValue<Vector2>()), out hit, 100))
            {
                agent.destination = hit.point;
            }
        }
    }
}
内容を簡単に説明すると、クリックした位置にRayを飛ばし、Rayがヒットした場所(hit.point)をNavMeshAgentの目的地(agent.destination)に設定しています。
実行して画面をクリックすると、その場所に向かってプレイヤーが移動するようになります。
スマホの場合も同様に動きました。
さいごに
Input Systemで「クリックした座標を取得」するのに少し手間取りましたが、後述の参考サイトの手順で何とか解決できました。
今の状態だとプレイヤーがどこに向かっているのかが分かりにくいので、ゲームに実装する場合はクリックした場所に目印を表示するなどのもう一手間が必要になりそうです。
コメント